
Chair Tutorial

You will need:
- one old chair!
- fabric {I needed two yards for mine}
- pliers, screwdriver
- staple gun
- sandpaper & stain {optional!}
1. First you'll need an old desk chair. Unscrew the back, bottom, and arms. {I started with the back first, then did the seat part when that was done.}

Back
2. Mine has a back that was two separate pieces. You'll need to take the staples out next. You can see them all in this picture!! There's a LOT!

I used a screw driver to lift up the staples and pliers to pull them out.
Once you have the staples out, you can take the old fabric off!

3. Lay your fabric over the piece and cut it to size. I used a spray glue to attach the fabric to the padding. This kind only takes 30 seconds to dry so I didn't have to wait!

4. Then staple the fabric on. I pulled it pretty tight before stapling.

5. Here's the finished back piece!

Our kitties weren't happy when it was time to start working on the bottom piece ;)

Seat
6. Take the staples out just like you did with the back.

My cushion was pretty flat, so I replaced it. I used the same old chair cushion that I used to make my seat crates. It was hard to cut! It's not perfect, but good enough!

7. Spray glue the fabric onto the cushion and staple away!! I put the top part together right away because I couldn't wait to see how it looked {that's why it's on the table without arms!} :)

Arms & Feet
8. This part is only if you have wood arms and feet! I sanded them down with an electric sander.
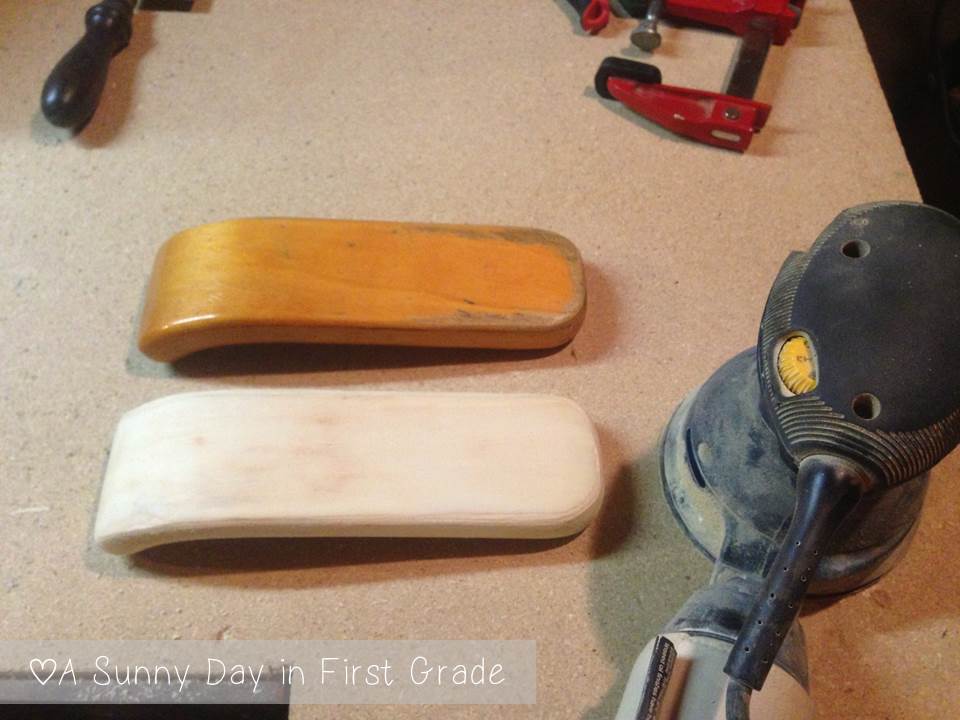
9. Then I stained them! I let it dry overnight.

10. I added a clear coat and let it dry {I don't like waiting!!!}

11. Put it all back together!


Love your chair tutorial - I really need to do mine!
ReplyDeleteI love doing "If you give a mouse a cookie" activities at the beginning of the year.
Oops...my email address is lizdeal5@gmail.com
Delete:)
I pinned your unit to my back to school board and would love to win! Ashleybowlesreed@hotmail.com
ReplyDeleteOops...my favorite back to school thing is teaching the kids about bucket filling
DeleteI love doing bucket filler activities too!! I bought a book at the beginning of the summer called "Have You Filled a Bucket Today?" Can't wait to read it with my kids!
DeleteI love to read Chrysanthemum and make Name Art that stays up all year!
ReplyDeleteMandmyoung@chartermi.net
I do a name art activity too! The kids always love it! :)
DeleteI pinned your magnets and your "Write Back to School" pack!! I am a brand new teacher starting my student teaching next week so I am in the process of finding my favorite back to school activities! My e-mail is happytobeink3@gmail.com. Thanks!
ReplyDeleteYou won the Pin it to Win it contest! I'm emailing you the pack now! :)
DeleteThose magnets are super cute!! I just may make some for my classroom...I have some magnets that aren't strong and I have to use like 5 to hang up a piece of chart paper! This way I could make them really strong! Thanks for sharing the tutorial!
ReplyDelete:) Sarah
First Grade Buddies
Thanks so much for sharing the magnet how-to with us. I love how they turned out! Definitely pinning for future reference!
ReplyDeleteLindsay
For the Love of First Grade
I have seen several recovered chairs, but didnt know how to do it. Your tutorial was awesome! Plus your fabric is super cute!'
ReplyDelete-Amanda
I love reading a back to school book and having everyone meet each other.
ReplyDeleteCarissa
criediger_95@yahoo.ca
Me too! I have so many back to school books! :)
DeleteThank you for posting the chair tutorial! I actually decided To cover my ugly chair at school but wasn't quite sure how! You're a life saver :) Oh, and your chair looks adorable!
ReplyDeleteThank you!! I'm so happy I could help :)
DeleteHey there!
ReplyDeleteI am planning a giveaway and would love for you to join. Email me!
deirdre.eldredge@gmail.com
Deirdre
A Burst of First
I pinned your "Write" packet. It looks like so much fun that I actually had it on my wish list:) I love teaching names in the beginning of school. My email is
ReplyDeletesillyteacher@sbcglobal.net
Thank you!! I love teaching names too! I always do a name art project with Chrysanthemum!
DeleteThe chair turned out amazing! What a great idea!
ReplyDeleteMarcy
SearchingForTeacherBalance